
Chief Architect Training Class
Summary 2021
Chief Architect Course Contents for:
Creating a Plan in Chief Architect, 4-Sessions, 6 Hrs. 52 Min.
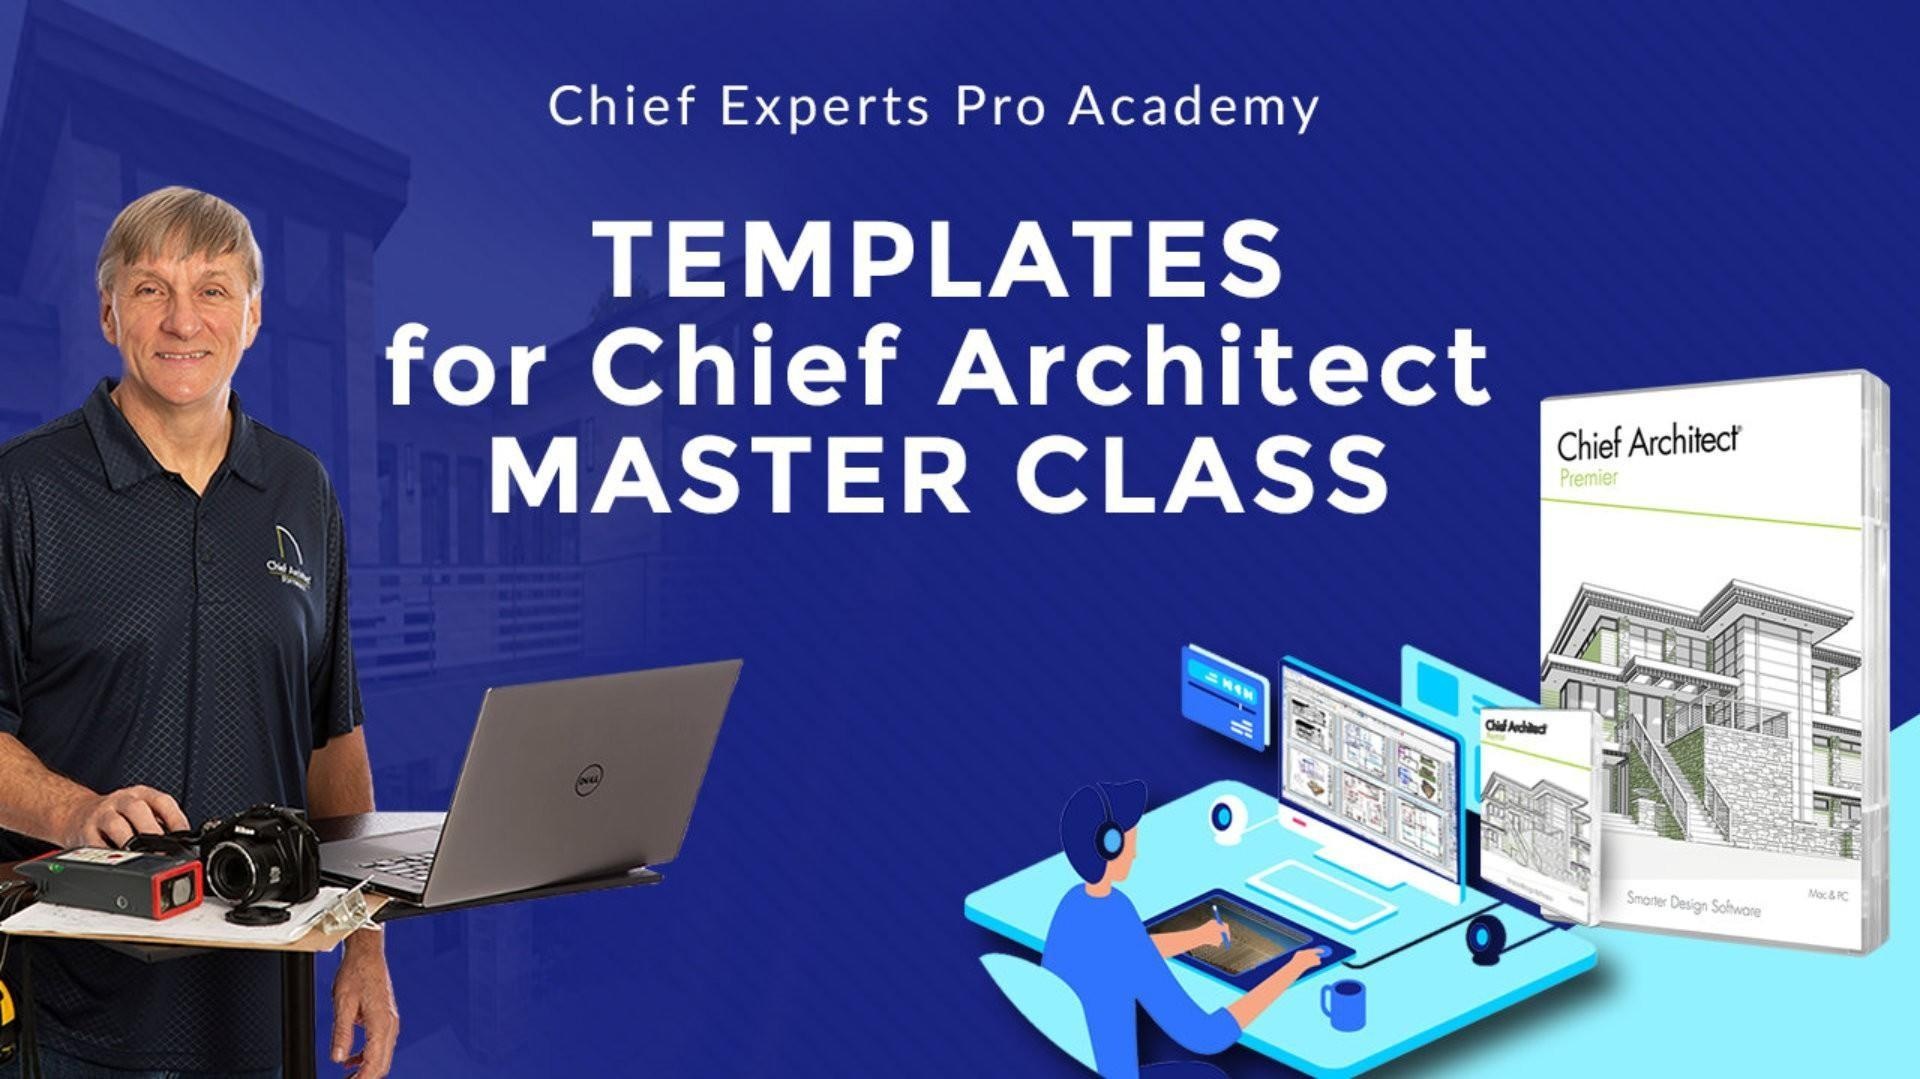
Templates for Chief Architect, 4-Sessions, 5 Hrs. 18 Min.
Mastering Chief Architect, 16-Sessions, 26 Hrs. 1 Min.
Structures in Chief Architect, 6-Sessions, 8 Hrs. 43 Min.
Structures Types and Terminology, 6-Sessions, 7 Hrs. 23 Min.
Total for all, 36 Sessions, 54 Hrs, 10 Min.
Search this page by selecting CTRL+F or CMD+F on your keyboard, then type in what you want. Click the session title to enter that session, and then fast forward to the time for your topic.
Creating a Plan with Chief Architect
This course is for you if you would like an in-depth demonstration of what it takes to set up and create a full set of plans using Chief Architect so you can stop guessing about the recommended process.
We'll work through the "best practices" methods to create plans using the supplied plan and layout templates and checklist. You'll discover the magic of layers and plan views, and much more.

1. Steps to Creating a Plan, Chief Templates and Plan Review
With a checklist that lays out the best practices for using Chief Architect to complete a set of plans, you'll get a brief overview of the program and a tour of the toolbars, defaults, and other prominent parts of the program. Then we'll dig into the discovery process that makes it easier to start a plan using the included templates.
1. The 6 Parts that Makeup Chief Architect (3:05)
2. Extended Tool Configuration (11:06)
3. About The Plan View (15:52)
4. The Basics On Snap Points (29:03)
5. Setting and Adjusting the Tool Palette (32:47)
6. Set tup for Icon Dropdown option (34:34)
7. Function of Edit Tools at the Bottom of The Screen (34:48)
8. How Screen Layout Changes with Each View (35:47)
9. Customizing Chief Preferences (36:40)
10. How to Change the Size of Icons on Screen (37:51)
11. Changing Colors/Size of Handles When Highlighting Something (38:54)
12. Open Dialogue to Last Panel Visited (40:43)
13. Benefits of Using a Computer Mouse (41:57)
14. How to Make a curved line (45:18)
15. The Difference Between Save Plan and Save Plan View (46:11)
16. What Do You Do When you Start a Plan (47:30)
17. Setting Your Defaults for a New Plan (53:15)
18. How to Customize Hotkeys (58:22)
19. How to Determine how to Start Layout (1:01:05)
20. How to Change the direction of North Point (1:02:05)
21. Dimensioning and Dimensioning tools in Chief (1:05:41)
22. Using Auto Dimensions (1:13:02)
23. Using Manual Dimensions (1:19:13)
Total Running Time 1 hour 27 Minutes
2. Creating a Plan Quick Start - Laying Out the Plan
Using the checklist, we'll lay out walls, roofs, and stairs that form the basis of the 3D model and the elements needed for the working drawings. We'll add windows, doors, cabinets, and more, and you'll see how to add these things so they will end up in the correct views for the working drawings. During this session, you'll discover the best practices for the optimal use of the program.
1. What To Do When Starting a Plan (1:20)
2. How to Go Split Screen for 2D and 3D model (12:24)
3. Different Camera Modes of Chief (13:11)
4. Adjusting Levels Right Away (17:41)
5. Dimensioning Interior Walls w/ Ruler tool (22:18)
6. Functions of The Floor Tools (24:42)
7. The Different Effects of Room Names (33:48)
8. Creating a Deck (41:47)
9. Using Chief's Break Tool (48:26)
10. Building a Foundation (54:31)
11. Adding Stairs to Your Plan (1:06:56)
12. Basics of The Auto Roof Function (1:24:42)
13. Paste Special Function (1:33:52)
14. How to Purge Materials You're Not Using (1:36:53)
15. Creating a Loft In a Nutshell (1:39:07)
16. Changing the Angle of a Wall (1:42:10)
17. How to do a Step Foundation (1:44:58)
18. Make a Concrete Riser Step (1:45:22)
Total Running Time 1 hour 49 Minutes
3. Creating a Plan Quick Start - Detailing the Plan
Detailing your plan is challenging and often the most tedious part of the process. In this session, we'll discuss the best methods to create your section and plan details. We'll discuss the methods used to create details from the model or using the 2D CAD tools included with Chief.
1. Railing Specifications (1:25)
2. Using Auto Dormer (12:00)
3. Manual Roof Making (20:15)
4. Joining Roofs Together With Join Roof Tool (26:29)
5. Creating a Vaulted Ceiling (37:26)
6. Creating a Tray Ceiling (42:06)
7. Brake Tool (46:50)
8. Join Line Tool (48:58)
9. Clear Brakes on Strait Edge Tool (51:13)
10. Point-to-Point Tool (52:17)
11. Creating a Pony Wall (58:12)
12. Interior Walls and Furred Walls (1:01:00)
13. How to Add Metric Measurements to Plan (1:11:06)
14. Using Doors in Chief (1:13:46)
15. Garage Doors in Chief (1:24:59)
Total Running Time 1 hour 38 Minutes
4. Creating a Plan Quick Start - Assembling the Plan.
We'll finish adding items in the plan to prepare them to get added to the layout pages. We'll then assemble your plan's views on the layout, including floorplans, elevations, 3D views, render views, and more. You'll see how some of the automation on the layout work to assemble your plans, so you'll be ready to hit the print button and review your completed plan.
1. Windows in Chief: Grouping and Customizing (00:31)
2. Bow and Bay Windows (13:51)
3. Working With Cabinets for Kitchens (20:54)
4. Creating a Custom Backsplash in Kitchen (38:51)
5. Setting Up Floor Material Regions (42:58)
6. Detailing The Kitchen Plan (50:35)
7. Switching Out Lights in Your Plan (57:01)
8. Framing In Chief (1:00:57)
9. Manually Drawing in Floor Trusses (1:15:16)
10. How To Get a Room Cross Section View (1:16:05)
11. Turning On Pages for a New Project Lay (1:23:57)
12. Floor Plan Pg. 2 of Layout (1:34:22)
13. 3D Views Page (1:43:10)
14. Create a Green Plate for the bottom Plate of Exterior Wall (1:45:08)
15. How To Divide Rooms Without a Wall (1:50:40)
16. How to do a Demolition or Renovation View With Layout pages (1:51:56)
Total Running Time 1 hour 58 Minutes
Contractors & Designers, Stop Letting Chief Architect Frustrate You!
Discover how you can use Templates in Chief Architect to save massive amounts of time in the creation of your plans.
Join us for the Templates Masterclass where you'll take Dan's templates that he's spent years creating and customize them for your business.
1. Introduction to Templates
Chief Architect Templates and Training
Dan and John go over the download and setup process for the newest Chief Experts Academy template. They also cover various settings for preferences, defaults, fonts, and plan views.
1. What is a Template (0:48)
2. How Dan created his Template (1:54)
3. How to change Plan Scale for Printing (7:07)
4. Default Settings in your Template (7:57)
5. Benefit of using Layer Control for Text Size vs. Text Style (9:20)
6. Set Extended Toolbars and add Icons (11:58)
7. Using Project Browser and Layers to Navigate your Plan (15:26)
8. Preference Settings (19:56)
9. Reset Toolbar (26:18)
10. How to Download Template from Chief Experts Academy (28:05)
11. Set up a Template to Open with a New Plan (31:14)
12. Changing Automatic Dimensions in Template (36:50)
13. How to Download Template for older Chief Architect Versions (38:51)
14. Methods for setting Defaults (39:58)
15. Using Style Palettes from Chief Architect (47:54)
16. Globally Changing Font Styles (49:06)
17. Change Cad Detail Default Text Size (55:38)
18. Globally Change Dimension Styles (56:39)
19. Change where the Leader Lines meet the Text (58:33)
20. Using a new Template with an older Plan (59:19)
21. Layer and Default Sets and Plan Views (1:07:34)
22. 3D and Elevation Views (1:22:24)
23. Save as Template make Default Template (1:26:57)
Total Running Time 1 hour 29 Minutes
2. Plan Templates for Chief Architect
This video breaks down the complex process of Layer Sets, Default Sets, and Plan View. Learn more useful information like making Note Schedules, creating Various Plans, 3D Views, and Elevations, and adding electrical systems.
1. Adding New Layer Set, Default Set, and Plan View (0:13)
2. Setting the Default Set (2:43)
3. Setting the Plan View (13:58)
4. Why to not save Plan View unless changes were made (19:37)
5. How to fix Active Default Changes (21:03)
6. Creating Special Cad Items (25:20)
7. Capture Button (30:31)
8. Adding Notes and Note Schedules (31:29)
9. Architectural Plans (36:41)
10. The As-Built Measuring Plan (38:42)
11. As-Built Plan for creating Dotted Lines (40:50)
12. As-Built verses Demo Plan (46:08)
13. Cad Details (49:12)
14. Electrical Plans (52:12)
15. Framing Plans (52:51)
16. Foundation Plans (57:56)
17. Furniture Plan (59:37)
18. NKBA Kitchen and Bath Plan (1:00:16)
19. Plot Plans, Surveys, and Plan Footprints (1:02:25)
20. Roof Layout Plan (1:07:11)
21. Square Foot Takeoff Plan (1:08:11)
22. 3D Elevations and Cross Sections (1:09:24)
23. 3D Views Full and Overview (1:11:48)
24: 3D for NKBA Kitchen and Bath Elevations (1:12:42)
25: Change Overall Line weight (1:14:13)
26: Change All Electrical Defaults (1:15:34)
27: Find Where a Specific Material is being used in Plan (1:16:48)
28: Put Electrical schedule on Electrical Plan (1:17:41)
Total Running Time 1 hour 19 Minutes
3. Layout Template
Learn further how to customize your layout template by customizing client info, adding pages and titles, changing text, and more. Furthermore, Dan shows how to create the plan index, add and move watermarks, and elevation views
1. Guiding Principles of Layout Template (0:14)
2. What is a Layout Template(1:35)
3. How this Layout Template is Set-Up (3:46)
4. How to Download the New Template (7:53)
5. Customize Company Information (11:41)
6. Customize the Client Info using Form vs Text (25:50)
7. Adding and Reordering Pages (36:35)
8. Adding Page Title and Drawing Scale (41:10)
9. Page Numbering (45:24)
10. Creating and Updating the Plan Index (48:41)
11. How to Change Text on Layout Universally (52:02)
12. Adding Plan Views (1:04:59)
13. Automatic Updating on Layout Page (1:07:41)
14. Adding and Adjusting Elevation Views (1:05:34)
15. Labeling Views Using Call Outs (1:11:54)
16. Adding and Editing 3D Views (1:14:30)
17. How to Add a Watermark to the Plan (1:17:27)
18. Why include Page Name and Size at top of Layout (1:18:20)
19. How Dan Names his Plan files when saving (1:19:53)
20. Add Callout to Cross Section Cad Detail & sync to layout (1:20:55)
21. Change the location of the Watermark (1:25:20)
Total Running Time 1 hour 26 Minutes
4. Template Q & A
Dan and John help answer a variety of questions from practical building processes like creating split stair landings to changing the Plan view Orientation. A few Chief Academy members screen share their specific questions for help with tuning up their own Template files.
1. How to Switch Plan View Orientation from Landscape to Portrait (0:30)
2. How to Highlight Edges in your Plan (2:35)
3. How to Add Titles and Scales to Viewport (10:14)
4. Title Blocks in each Size (14:26)
5. How to Have Auto Dim show surface to surface on As-built with regular Dimensions on New Addition (15:55)
6. How to Send Questions in on Pro Academy (21:50)
7. How to Create a Split Stair Landing and a Bottom Stair landing (24:55)
8. Distinguish the new wall to the existing wall for Remodel (26:58)
9. What you Can turn off with Layers (29:43)
10. Sync Section Lines and Callouts to Camera Views (30:54)
11. Does Auto Legend Show Wall Hatches? (35:26)
12. Can you have Different Title Block info on different size layouts? (38:31)
13. How to save Contact Info in Template File (39:50)
14. What can be imported and Export on Template (42:08)
15. General Drawing Process conversation (44:24)
16. Send plan to Layout & Change plan view (48:53)
Total Running Time 57 Minutes
Discover the Inner Workings of Chief Architect and What it Wants From You
To truly use Chief Architect to its fullest, it's essential to understand the program's many tools and their use in the design process. The Mastering, Step-by-Step series is designed to do just that. Here is where you'll discover how the program thinks and what you can do to get it to do what you want. Follow along as veteran Dan Baumann leads you through each facet of the inner workings of Chief Architect.

1. Plan Setup, Templates, Optimizations, and Interface
In this introduction to Chief Architect, you'll get an understanding of how to navigate the inner working of the program. Including an Overview of Chief's main parts, Optimal Toolbar Settings, proper use of the mouse, things you must know about defaults and preferences, best keystroke shortcuts, navigating the menus and icons, zoom tools, and cameras, along with essential time-saving tips. You'll also have a chance to download the included templates and get them set up on your system.
1. What is Chief Architect? (03:14)
2. How to Link Text to a Document, PDF, or Website (18:09)
3. Example of how the Template is Used (19:55)
4. Getting to know the Plan View (23:38)
5. That Templates Included with the Course (25:52)
6. How To Customize the Toolbar (30:31)
7. How to Keep Video Card Drivers Up to Date (40:00)
8. How to Import Toolbar From Other Plans (41:19)
9. Getting to Know the User Interface (41:58)
10. Using Time Manager to Document Work Hours (45:18)
11. Adding New Additional Angles (50:30)
12. Toolbar on the Right Side (57:35)
13. Setting Up Key Strokes (1:04:17)
14. How the Mouse Functions In Chief (1:15:49)
Total Running Time 1 hour 27 Minutes
2. Mastering Chief's 2D CAD Tools
Chief Architect is a great 2D and 3D CAD program. It has tools that help make drawing and modeling more manageable, and you'll get more accurate results.
In this session, you'll discover the right way to use the many CAD tools. Since everything is Chief centers around the 2D CAD function, it's essential to approach each drawing, understanding how it works and why it's crucial.
Knowing how things like snaps, X-Y-Z, trim, fillet, chamfer, and many other functions work in Chief, you'll have a much better understanding of why all of those tools are in the program, how to use them and how they save you time throughout the drawing process.
1. Cross-Section Camera and Other Camera Options (3:22)
2. How to Change Number Style (11:50)
3. X, Y, Z Delta and How to Move Objects in Space in Chief (12:21)
4. Importance of the CAD Line in Chief(23:22)
5. How to Bend CAD Line for Curved Staircase (27:00)
6. How to Convert Drawings into 3D Objects (32:13)
7. Overview of CAD Tools In Chief (33:33)
8. CAD Defaults (43:05)
9. Marquee Select Tool (56:27)
10. Learn Each Edit Tools Group 1: Rectangular Polyline Box, Next Object, Edit Dialog Open, Copy/Paste, Sticky Mode, Paste Hold Position, Snap Point to Point, Reflect About Object, Delete, Detach Selected Edge(1:02:23)
11. Customize Hotkeys (1:09:26)
12. Learn Each Edit Tool Group 2: Transform Replicate, Multiple Copy, Set Multiple Copy Interval, Marque Select, Select Similar Objects, Restrictive Select, Parallel/Perpendicular, Add Selection Library(1:18:49)
13. Learn Each Edit Tool Group 3: Center Objects, Point to Point Center, Reflect About Center, Match Properties, Apply Properties, View Draw Order Edit Tool, Sent to Back, Send Back One Level, Choose Level for Selection, Bring Forward One Level, Bring to the Front (1:45:02)
14. Learn Each Edit Tool Group 4: Break Line/Wall, Complete Break, Trim Objects, Extend Objects, Convert to Spline, Polyline Union, Polyline Intersection, Polyline Subtraction (1:53:18)
15. How to Turn On the Tool Palette (if closed out) (1:57:43)
16. Learn Each Edit Tool Group 5: Convert Polyline, Convert to Plain Polyline, Add Revision Clouds, Change to Arc/line, Convert Curve to Polyline, Lock Arc Center, Make Arc Tangent, Fence Select, Object Layer Properties, Intersect/join Two Lines (2:04:00)
17. Learn Each Edit Tool Group 6: Fillet Lines, Set Fillet Radius, Chamfer Lines, Chamfer All Corners, Align/Distribute on Line, Align/ Distribute Objects, Create Hole (2:07:58)
18. Object Layer Properties (2:13:35)
19. Drawing a Quick Section (2:16:04)
20. How to Move Something (Like a Wall) by an Exact Amount (2:27:35)
21. Sending Plan to The Layout (2:28:27)
22. Loomio for Recording Questions on Chef (2:34:21)
23. How to Use Match Properties to Modify Cabinets (2:36:07)
Total Running Time 2 hours 40 Minutes
3. Layout Strategies, Walls, Dimensioning
There is a right way to start and create a Chief plan, and in this session, you'll discover what it is. Understanding how to dimension your plans and do it quickly is the focus of this workshop. You'll also discover the procedures and the tools used to lay out everything correctly for the 2D plans and 3D Models.
1. Drawing an Exterior Wall (4:15)
2. Wall Type Definition and Exterior, Main, & Interior Wall Layers (4:43)
3. Interior Wall Defaults (13:22)
4. Strait Foundation Wall (19:18)
5. Pony Wall (22:25)
6. Straight Glass Wall (28:47)
7. How To Line UP Walls Easily (35:04)
8. Straight Half Wall (39:58)
9. Room Divider Wall (42:31)
10. Wall Material Region (43:52)
11. Wall Hatching (46:07)
12. Special Edit Tools In Lower Toolbar (48:30)
13. All Tabs in Edit Dialogue (49:41)
14. Double Wall (55:33)
15. Add to Library Function (1:05:24)
16. Using the Break Tool (1:08:52)
17. Changing Walls, Curved Wall Tools (1:10:50)
18. Connect Walls Tool (1:18:09)
19. Adjust Layers on Ends of Walls Tool (1:19:50)
20. ICF as Pony Wall with Brick Veneer (1:25:27)
Total Running Time 1 hour 38 Minutes
4. Dimensioning, Platforms, Foundations
It's not a 2D world anymore! If you've been in the industry long enough, you undoubtedly remember the days of 2D drawing with pen and paper. Welcome to the digital age. In this session, you'll discover what it takes to create an accurate 3D model for specific parts of your plan. It's a crucial step in creating accurate framing, sections, and elevations.
1. Manual Dimensions (1:35)
2. How To Open Dimension Default (8:15)
3. How to Dimension In Chief (13:13)
4. How to Dimension to the Side of the Window Instead of the Window Center (18:50)
5. How to Enlarge Dimension Handles and Change Their Color (22:11)
6. End-to-End Dimension Tool (25:19)
7. Angular Dimension Tools (27:46)
8. Interior Dimension Tool (29:28)
9. How To Get Rid of All Your Dimensions (31:20)
10. Interior Wall Dimensions NKBA Kitchen & Bath (36:17)
11. Point-to-Point Tool (37:02)
12. Baseline and Running Dimensions (40:44)
13. Editing Tools for Dimensioning (43:15)
14. Auto Dimensions (49:12)
15. NKBA Auto Story Pole Tool (57:44)
16. Floors, Rooms, Foundation: First Floor (1:03:00)
17. Add New Floor Tool (1:13:50)
18. Build a Foundation Tool (1:17:28)
19. How to Highlight all Cabinets in Plan (1:31:13)
20. Hole in Floor and Ceiling Tool (1:31:58)
21. Rebuild Walls, Floors, and Ceilings (1:35:01)
22. Select Same Height Tool (1:41:47)
23. How to Show Label in Plan (1:46:11)
24. Framing a Room Basic (1:47:42)
25. Room Molding Polyline Function (1:48:15)
26. Trey Ceiling (1:49:32)
27. Create a Schedule for Room Finish Schedule (1:50:50)
28. How to Add Elevation Camera (1:51:18)
Total Running Time 1 hour 53 Minutes
5. Stairs, Decks & Porches
One of the great things about working with a 3D modeling program is that it understands floor and ceiling heights, among many things. It knows how to make the calculations for stairs and ramps automatically. You can also create detailed decks and porches, and in this session, you'll discover many tips that allow you to bring them to life.
1. Intro to Porches (1:35)
2. How to Add Deck Rail for Screen Porch (17:04)
3. How to Create your own Deck Panel Railing (19:32)
4. Adding and Adjusting Terrain (26:45)
5. How to Make Deck Steps Wrap around Corners (40:55)
6. The Basic Elements of Stairs (47:17)
7. Types of Stairs you Can Add to your Plan (55:02)
8. Stairway with Railing Connecting to Step (55:49)
9. Make Staircase with Pony Wall and Railing Cap (1:01:30)
10. Create your own Stair Railing w/ Panel (1:04:42)
11. Creating L-Shaped and U-Shaped Stairs (1:07:12)
12. Curved Stairs and Other Stair Options (1:16:28)
13. Create Open Below on 2nd Floor for Stairs (1:21:22)
14. Split Entries (1:23:29)
Total Running Time 1 hour 35 Minutes
6. Windows and Doors
Imagine if you had to create every element of your plan from scratch. Fortunately, Chief gives you the tools you need to add these items to your plan with a few clicks. In this session, you'll discover how to add, change, customize, group, and display these elements for your clients as realistically as possible. In this session, you'll discover techniques and shortcuts to help you with all of your plans.
1. How to Download Library Catalogues (1:07)
2. How to Add Icons to Toolbar & Save Custom Toolbar (3:14)
3. Different Kinds of Door Icons (5:40)
4. Door Options in Door Menu (11:57)
5. Exterior Door Specification Options (17:34)
6. Creating a Lintel for Doorway (24:24)
7. How to Add an Arch to The Door (33:37)
8. How to Make Glass Door Default for Shower Door (45:08)
9. Edit Icons: Copy and Copy Options Icon (46:17)
10. Select Similar Icon (49:28)
11. Item Materials Icon (50:51)
12. Using Style Palettes & Creating Your Own (54:23)
13. Add your Own Objects to Your Style Palettes (56:32)
14. Customizing Toolbar Placement on Screen (57:15)
15. Why would you Have a Double Wall? (57:35)
16. How to Update Video Drivers (58:05)
17. Focus on Selected Icon to Create Focal P (59:31)
18. Replace from Library Icon (1:00:31)
19. Centering Tool Icon (1:01:43)
20. Change Hinges Tool Icon (1:03:26)
21. Open in 3D Tool Icon (1:03:48)
22. Find Original in Library Tool Icon (1:06:18)
23. Create your Own Custom Muntins (1:13:18)
24. How to Customize Window Shape (1:16:01)
25. How to Make Mull Doors (1:19:38)
26. Adding Window Treatments inside and Outside (1:23:57)
27. Corner Style Windows (1:25:27)
28. How to Make a Corner Door (1:26:28)
29. Bay Windows (1:29:37)
30. Box Window (1:32:06)
31. Bow Windows (1:33:13)
32. Pass Through Windows (1:34:24)
33. Wall Niche (for shower soap Niche) (1:35:38)
34. How to Put Library onto Another Computer (1:37:48)
Total Running Time 1 hour 38 Minutes
7. Cabinets and Kitchens
In this class, Dan goes over the various options of cabinets and how to customize them to match your exact ideas. Learn how to manually set Drawer layouts, create unique Cabinet Shapes, and master Countertops. You'll get an inside look of how to build cabinets and shelves to make your kitchen layouts even better, along with helpful additions like Backsplashes and switching up your style with Style Palettes. Plus how to save your own custom designs into the library to use in any future plan.
1. Base Cabinet Default Changeable Options (2:12)
2. How to Create a Corner Cabinet (8:13)
3. How to Resize or Reflect Cabinets to Make Your Own Custom Shape (7:32)
4. Angled Front Cabinet Style (8:22)
5. Elevation Reference Setting (8:43)
6. How to Change Drawers and Doors on Cabinet Face (10:41)
7. How to Manually Set Shelves and Customize Cabinet Face (15:20)
8. Appliance/Doors/Drawer in Cabinet Specification (16:40)
9. Drawer Face Item Specification in Cabinet (22:37)
10. How to Make a False Door for Cabinet (26:37)
11. How to Make a Sloping Beam and Ceiling (27:34)
12. How to Put Shelving Directly into Wall (32:40)
13. Creating a Refrigerator Surrounding Shelf (34:24)
14. Recess Refrigerator into the Wall with Niche (36:41)
15. Custom Counter Tops (39:08)
16. Custom Backsplash Tool (41:49)
17. Custom Counter Top Continued (48:24)
18. Countertop Edges: Fillet, Chamfer, and more (50:27)
19. How to select all of the Same Cabinet Types in Plan (56:20)
20. Add to Library for Cabinets (58:28)
21. How to Select Specific Parts of the Cabinet (1:00:52)
22. Style Palette (1:01:11)
23. Door Styles in Cabinets (1:06:23)
24. How to Adjust Labels for Cabinets (1:09:58)
25. How to Find a Specific material in Library (1:13:33)
26. Creating Elevations(1:15:02)
27. How to Add a Cabinet Note to your Plan (1:17:19)
28. Kitchen and Bath Configuration for Toolbar (Specific Toolbar for Kitchen and Bath Work) (1:18:09)
29. How to Show Different Layouts (For Presenting Different Options to Clients) (1:22:26)
Total Running Time 1 hour 26 Minutes
8. Roofs – Strategies for Automatic & Manual Roofs
The Automatic roof tools in Chief allow you to model many roof ideas quickly. But it's the manual roof tools that allow you to get the final results that you want. In this session, you'll discover the steps to add virtually any roof system to your plan. We'll start by discussing how the Automatic roof tools work. Then show you step by step the process of manually adding, editing, and creating the roofs you want.
1. Build Automatic Roof Tool (2:30)
2. Roof Plane Tool (7:05)
3. How to Create a Vaulted Ceiling (14:02)
4. Tray Ceilings Tool (17:58)
5. Truss Base Tool (21:52)
6. Gable Roof Line Tool (26:10)
7. Sky Lights Tool (30:41)
8. Auto Floating Dormer Tool (37:11)
9. Edit All Roof Planes Tool (52:39)
10. Delete All Roof Planes Tool (54:26)
11. Edit Tools and Their Functions (55:45)
12. Open Dialogue and Copy Paste Tool (55:54)
13. Tranform Replicate Tool (59:13)
14. Marquee Select Tool (1:00:17)
15. Make Parallel Tool (1:01:13)
16. Point-to-Point Tool (1:02:49)
17. Break Tool (1:03:52)
18. Poly Line Union Tool (1:06:46)
19. Move to be Coplanar Tool (1:08:07)
20. Roof Framing Tool (1:09:04)
21. Build Roof Basics and Settings Options (1:11:59)
22. How to Use the Automatic Roof Tool (1:17:04)
23. Making a Gable Wall with Automatic Roof 1:23:13)
24. Using Concrete Roof Tiles (1:30:15)
25. Tips for Drawing Ceiling Plane(1:34:05)
26. Baseline Poly Line Checkbox in Auto Roof (1:35:54)
27. Questions about a Coffered Ceiling (1:38:16)
Total Running Time 1 hour 47 Minutes
9. Roofs – Manual Roof Techniques
Roofs in Chief Architect are one of the more challenging areas of the program to master. In this session, we'll dig deeper into how you can create just about any roof you want and the processes you can use to figure out different roof types.
1. Manual Edits on an Auto Roof, Raising Height (6:18)
2. For a Gable Roof do you Need to Mark it? (21:01)
3. Creating a Roof from the Beginning(21:37)
4. Building a Manual Roof from the Beginning (26:43)
5. Join Tool for Manual Roofs (37:35)
6. Hip To Hip and Other Joins (45:56)
7. How to Add a Vaulted Ceiling to Manual Roof (55:06)
8. How to Turn off the Ridge Cap on the Roof (1:05:17)
9. Adding a Dormer to your Manual Roof (1:08:27)
10. Open Dialogs to the Last Panel Visited (1:14:30)
11. How to Join Breaks that Join Tool Cannot (1:15:56)
12. Auto Floating Dormer Tool (1:19:00)
13. How to Change the Style of Automatic Dormer (1:21:04)
14. How to Draw a Dormer Through a Gullwing (1:23:15)
15. Doing a Clear Story (1:40:11)
16. Icon To Edit Active Camera (1:48:04)
17. Hide Camera Facing Exterior Wall (to see through wall) (1:48:48)
18. Clear-Sided 2-Story W/ Pitch Open (1:49:19)
19. Where to get Blocks For Chief Architect(1:51:56)
Total Running Time 1 hour 52 Minutes
10. Layers, Layer Sets, Default Sets & Plan Views
If you're drawing a simple one-view plan, you probably don't need to use layer sets or plan views. Anything other than that, and you will be able to save a lot of time in the process of creating workings docs with a firm understanding of layers and layer sets, default sets, and plan views. In this session, you'll discover how you can use these tools to create plans much faster.
1. What Are Layers and Layer Sets in Chief (7:28)
2. Layer Sets in Chief Architect (16:39)
3. Creating a Layer Set (18:09)
4. Best way to Set up Roof Layout Layer Set (21:53)
5. Default Sets in Chief Architect (23:10)
6. The Process of Creating a New Type of Plan View (29:05)
7. Creating a New View for Countertop Layer (39:33)
8. Using the Layer Hidden Tool to change Layer Set Checkmarks (52:08)
9. Importing Plan View Set (1:02:47)
10. How to Export/Import Default Sets (1:05:26)
11. How to bring Old Plan into New Template (1:07:33)
12. A Way for displaying a Demo Plan (1:17:36)
Total Running Time 1 hour 21 Minutes
11. 3D Slabs, Moldings, Trim & Solids
Just about anything you draw can be a 3D object in Chief. Discovering how to add details to your 3D model allows you to show your clients a much better representation of their getting. With the details you can add, your plans will shine above the rest.
1. Three Main Tools for Building with Slabs (3:52)
2. Corner Board Tool (4:16)
3. Molding Poly Line Tools (11:13)
4. How to Replace Molding with Different (25:08)
5. How to Make your own molding Poly Line (32:09)
6. Create a Column with Slabs (39:43)
7. How to change Column Texture (44:01)
8. How to make an Object into a symbol (53:24)
9. 3D Molding Poly Line (59:00)
10. Using Molding Tool to Build Picture Frame (1:02:29)
11. How to Draw a Dentil Molding (1:04:14)
12. How to Make Multiple Trim to a Column (1:08:02)
13. Second Example for Using a Pre-drawn Cross Section(1:12:27)
14. How to Change Default Poly Line Solids in x13 (1:13:33)
15. How to Put a Hole through any Slab (1:17:25)
Total Running Time 1 hour 21 Minutes
12. 2D & 3D Framing, Sections & Details
One of the advantages of modeling your drawing is being able to see how the structure works. With Chief's automatic and manual framing tools, you can also see how the structure gets put together. Getting answers to questionable structural issues can save a lot of money in a project. Your plans will fly through inspections, and your crews in the field will be able to construct your project in less time with fewer mistakes.
1. How to Get the Library folder from x12 to x13 (2:40)
2. Where the Framing Options are Located (7:23)
3. Setting Framing Defaults when Starting a Plan (9:20)
4. Getting To Defaults Settings Through Icons (11:38)
5. Making Adjustments for the Whole Plan After (21:11)
6. Turning Layers Off Set To Specific Portions (29:18)
7. Framing on a Room by Room Basis (40:09)
8. Framing an Addition (44:45)
9. How to Create a Valley Set for Trusses (52:54)
10. How to Change Header Size for Windows (55:00)
11. 3D Framing As-Built Vs. New View (57:18)
12. How to Manually Change individual headers and Studs in Framing (58:37)
13. Framing Corner Options (1:00:57)
14. Stairs and Stringers Framing (1:02:17)
15. Cross-Section Camera for Framing (1:07:06)
16. Building a Deck with Boarder Planks (1:12:04)
Total Running Time 1 hour 18 Minutes
13. Electrical, Lighting & Mechanical
Creating electrical and mechanical plans is one of the easier things to do in Chief. Many built-in tools make adding electrical items a snap. Along with that, you'll also discover essential steps to set up the lights to get the best rendering results. If you need to show other mechanical items in your plan, we'll discuss that, and you'll learn some cool techniques to add items in 2D and 3D.
1. Starting the Electrical in your Plan (4:29)
2. Creating a Recess Light (6:56)
3. Place Outlets In Plan, Setting Defaults, (11:09)
4. 3D Library in Chief for Light Fixtures (16:40)
5. How to Update Library Catalogues(23:59)
6. How to Create and Save Your User Libraries (27:06)
7. Easy GFCI Outlet Tool (32:26)
8. Rope Lighting (useful for under cabinets (34:02)
9. Electrical Switches at the Bottom of Steps (41:26)
10. How to Unify all electrical connections (42:25)
11. How to get left or Right arching electrical Path When Setting it in Path(43:41)
12. Select Objects Icon to Select all Electrical on Plan (45:35)
13. How to put the existing Layer of electrical on Its own Layer (47:47)
14. Editing Size/Function of any Symbol (51:25)
15. Using Alignment Tool on Light Fixtures (57:32)
16. Move to Front and Back Tool (1:04:28)
17. Find a Symbol in Library Tool(1:09:24)
18. Adding Notes to Your Plan/Electrical Leg (1:12:14)
19. Dan Shows His HVAC system in Plan (1:25:28)
Total Running Time 1 hour 27 Minutes
14. Assembling the Working Drawing on Layout Pages
Assembling your plans on the layout is often accomplished when everything gets completed. In this session, you'll get an understanding of how floorplans, elevations, sections, CAD detail windows, 3D views, and more are set up and assembled onto a layout. You'll also discover the importance of layers and layer-sets, default sets and plan views, and how they work with everything that you do. This session includes a layout template.
1. General Rules for Layouts (2:06)
2. Referenced Plan Files Functions (4:25)
3. How to Change Line Thickness (scaling) (8:01)
4. CAD Details in Chief (11:24)
5. Elevations in Chief (12:00)
6. How to Arrange Multiple Cameras in Plan (16:15)
7. Creating a New Layout With Template (19:07)
8. Layout Page Icon Breakdown (20:11)
9. Edit Items in a Vector View Tool (23:19)
10. How to Add a Revision Table to Template (32:04)
11. Layout Page Table (37:58)
12. Macros In Layout Labels (40:34)
13. How to Change Paper size for print Template (48:39)
14. Update Views Icon and Each Function (51:00)
15. How to Change Scale of Drawing in Plan (1:06:51)
16. Doing a Callout from Scratch (1:10:19)
17. Creating a Window Schedule (1:17:14)
18. Schedule Icons and Their Functions (1:19:38)
19. Link and Layer Icon and Their Functions (1:24:15)
20. Floor Joist Layout With Toilets (1:26:57)
Total Running Time 1 hour 36 Minutes
15. Schedules, Notes, Text
In this session, you'll see how you can add and customize plan notes and schedules in your plans. These tools in Chief have come a long way over the years and are fantastic. We'll also discuss how you can create high-quality renderings and walkthroughs and some presentation methods that will blow your clients away.
1. Text Icon In Chef & Text Preferences (1:39)
2. How to Change Text Styles In Layer Dialogue (8:15)
3. Changing the Chief Blueprint Font Size (10:14)
4. How to Keep Arrow Line Strait When Moving Text (14:13)
5. How to Make Lines Closer together in Rich Text(18:22)
6. Callouts in Chief (20:28)
7. Features in Callout Dialogue Box (29:33)
8. Markers in Plan & Story Poles (34:00)
9. More Marker Specifications (37:47)
10. Notes in Chief (38:38)
11. How to Copy and Moves Notes to Different Floor (45:04)
12. How to Change the Shape around Numbers in Notes (51:31)
13. Text Macro Management (52:06)
14. Edit Rich Text in Place Icon & Highlight (1:00:12)
15. How to Change Plain Text into Rich Text (1:02:48)
16. Align tool for Aligning different Text (1:03:45)
17. Custom Schedules and Managing Them (1:06:19)
18. Creating a Wall Schedule (1:12:21)
Total Running Time 1 hour 17 Minutes
16. 2D & 3D Terrain, Plot Plans, Import & Export
To truly get an accurate plat plan, you'll want to consult with a survey company. But often, you're already working with an existing plat plan, or you need something close that displays your building on the property. In this session, you'll discover how to create accurate plat plans as well as representations of a plat. You'll also learn how to work with the 3D terrain tools to create an exceptional rendering.
1. How to Create a Plan Footprint (4:18)
2. How to Use the Hide Layer Icon (5:44)
3. How to Get The Square Footage of Your Plan (6:04)
4. Creating a Plan Footprint From Scratch (11:56)
5. Using Google Maps Screen Capture for Plot Plan (20:57)
6. How to Make Plot Plan Full Scale to Draw Over in Plan (25:12)
7. How to Rotate Plan Footprint (37:29)
8. How to Create a 3D Terrain (41:21)
9. Jon Draws a Plot Plan from Scratch (50:39)
10. Creating Terrain in Chief (1:02:49)
11. Adding Terrain Contouring (1:12:18)
12. Adding and Editing a Retaining Wall to Terrain (1:18:05)
13. How to Change Retaining Wall into a Partition Wall (1:26:57)
14. How to Cut an Egress Window in Terrain (1:31:53)
15. Adding Roads, Driveways, & Side Walks to Plan (1:36:46)
16. Turning your Terrain into a Symbol (1:41:17)
Total Running Time 1 hour 44 Minutes
Defining And Drawing The Structural Elements In Your Projects
In this course, you'll discover how to figure out, draw, and model the building's structural elements. With this process, you'll know how to start and work on your plans to get you to your final results faster.
You'll discover proven methods for asking the questions necessary to get the answers you need to add the proper elements to your plans using the many 2D and 3D tools in Chief Architect.

1. Getting To Know The Chief Architect CAD Functions
Starting a plan means understanding how the building will get designed and built. You'll see how to preplan the process so that as you are adding elements to the plan, you'll have a clear picture of what you want to accomplish.
1. Setting the Extended Toolbar (07:30)
2. Keystroke Basics and Customizing Hotkeys (10:10)
3. Point-to-Point Move & Opening an Object (16:26)
4. Uses for a Three-Button Mouse (23:38)
5. Setting Colors in Preferences (35:55)
6. Snap Tools (39:39)
7. CAD Box Tool (48:47)
8. CAD Tool Basics (49:09)
9. Moving Things on X, Y, Z-Axis (56:58)
10. Understanding the EDIT Icons (1:00:53)
11. Customizing Window Default Labels (1:05:54)
12. Displaying Patterns in 3D (1:12:37)
13. Using Gable/Roof Line Tool (1:15:43)
Total Running Time 1 hour 19 Minutes
2. Defining Project Parameters & Using Chief's 2D CAD
Discover how to approach the plan with the construction details in mind so that as you create the Chief model, it will be correct. In some situations, it pays to spend the time upfront, defining how the building will get structured before attempting to model it in Chief.
1. Learning The Edit Toolbar (4:27)
2. Next Button on Toolbar (5:47)
3. Open Edit Dialogue (6:22)
4. View Draw Order Edit Tool (8:01)
5. Copy and Paste Tool (11:09)
6. Delete Button on Toolbar (15:01)
7. Move a Line from a Shape Button (16:00)
8. Transform Replicate Icon (16:50)
9. Number Display for Dialogs (23:07)
10. Add Additional Angles for Snaps (30:59)
11. Making Multiple Copies of Items (32:56)
12. How to Reflect About Tool (39:15)
13. Alignment Parallel or Perpendicular (41:48)
14. X Key for Resizing (46:41)
15. Point-to-Point Move (S Key) (49:27)
16. Centering Tool (51:55)
17. Point to Point Snap (54:09)
18. Reflected Object (56:27)
19. Match Properties Button (58:19)
20. Break Tool (1:01:12)
21. Trim and Extend Tool (1:08:48)
22. Cloud Drawing Tool (1:11:22)
23. Arc/Line Tool (1:11:37)
24. Fillet and Chamfer Tool (1:15:16)
25. Tool Pallet (1:17:39)
Total Running Time 1 hour 20 Minutes
3. Setting up the Plan and 2D CAD Drawing Techniques
Whether you're drawing your details in 2D or getting them from the 3D model, you'll need to specify them correctly in Chief. In this session, we'll discuss the various methods used to accomplish this. We'll also discuss "Best Practices" to use when drawing details using the 2D CAD Tools.
1. Adding Details to Sample House Plan (9:48)
2. Considering Scale for Plan's Text (13:34)
3. Starting a House on Level One (14:56)
4. Transform Replicate Hotkey (22:12)
5. Center the Footing While Leaving (25:43)
6. Adding a Fill into a CAD Box (30:17)
7. TAB Key to move items (34:07)
8. Adding Sloped Rafters to a Detail (46:23)
9. Add Additional Angle to Snap Function (52:38)
10. Reflect to Create Mirrored Copy (58:40)
11. Customize Dimension Text (1:00:53)
12. Polyline Union to Create New Shape (1:10:13)
13. Group Multiple Items into a Block (1:12:13)
14. Adding Details to a Library (1:13:04)
15. Exporting and Importing Libraries (1:15:08)
Total Running Time 1 hour 20 Minutes
4. Defining Decks, Floor Structures
In this session, we'll take a close look at how to fine-tune various framing elements in Chief, so you're sure that the structure in your plans is correct in 2D and 3D. We'll work on the strategy for doing different ways. Creating and framing a deck and automatically and manually working on floor framing.
1. Drawing a Deck Automatically (3:45)
2. Changing Deck Structure (8:26)
3. Staggering Deck Joists (15:08)
4. Drawing a Deck Section (24:11)
5. Multiple Copy Evenly Spaced (25:54)
6. Reflect Tool on The Deck (31:34)
7. Clean Up Fraction Spaces (35:34)
8. Framing a Room & Adding Ceiling Trusses (36:41)
9. Delete Object Groups in Plan (43:48)
10. Frame Individual Rooms (45:19)
11. Floor Framing in Plan (46:57)
12. Framing Entire House (56:41)
13. Setting Default Size Floor Framing (1:03:45)
14. Open Below For Stairs (1:05:36)
15. Adding Additional Framing (1:06:53)
16. Setting Ceiling and Floor Heights (1:10:20)
17. Framing Floors Automatically (1:15:21)
Total Running Time 1 hour 23 Minutes
5. Defining and Modifying Wall Structures
In this session, we'll take a close look at how to fine-tune various framing elements in Chief, so you're sure that the structure in your plans is correct in 2D and 3D.
1. Wall Framing Overview (0:51)
2. Framing Reference Marker (6:03)
3. Rebuilding the Framing (10:34)
4. Adding and Resizing Hatching (11:58)
5. Setting Framing for Windows and Doors (22:04)
6. Manually Editing Framing (35:44)
7. Adding Bracing (Bridging) (46:08)
8. Manually Adjusting Framing (47:41)
9. Balloon Framing Through the Ceiling Above (51:49)
10. Adjusting Rough Openings (58:37)
11. Door and Window Labels (1:05:42)
12. Adding Bearing Points (1:08:11)
13. Furred Double walls (1:11:42)
14. Displaying As-Built Dotted Lines (1:15:05)
15. Changing Dimension Text Size on Layout (1:23:11)
16. Double Arrows (1:33:06)
17. Adding Furring Walls (1:37:00)
18. Reset the Toolbar to Default (1:39:16)
19. Adjusting Stem Wall Top Height (1:40:37)
Total Running Time 1 hour 42 Minutes
6. Defining Roof Structures and Bearing Conditions
There is a process you want to follow when framing the roof structure. Whether it's hand framed or trusses, there are easy ways in Chief to get the results you want. We'll also discuss how you can make sure that your design will be able to withstand the forces of gravity when it's gets built.
1. How to Group Delete Different Items in Plan (1:05)
2. Setting Defaults for Roof Framing (11:23)
3. Drawing Roof Trusses Starting Point (15:35)
4. CAD Detail Page with All Trusses in Plan (20:24)
5. Determining the Energy Heel Height in Roof (26:54)
6. Making a Gable End Truss for Roof (32:04)
7. Building a Simple Plan with Auto Roof Generator (40:11)
8. Creating a Bonus Room (42:08)
9. Add Attics to Plan (46:22)
10. How to revert room trusses to precise Thicknesses (50:28)
11. Parallel Chord Truss (53:01)
12. Scissor Truss (55:46)
13. Manually Frame the Entire Roof (56:59)
14. Doing a Plot Plan and Importing DWGs (1:02:54)
15. Set a Terrain Perimeter (1:11:30)
16. Show the Setback Lines in a Plot (1:18:09)
17. Change Text Size in Plan View (1:22:38)
18. Another Way to do Concentric Jump (1:25:48)
19. How To Create Plot Plan in Plan Footprint (1:28:39)
20. How Set Label to Decimal Feet in CAD Details (136:58)
Total Running Time 1 hour 39 Minutes
Understanding And Defining The Structural Elements In Building Construction
This course is for those looking to gain a better understanding of the many different structural elements, building methods, and terminology that goes into how a building gets planned and constructed.
We'll proceed step-by-step through many examples of building construction methods that will allow you to communicate the structural elements of a project with everyone involved in its construction.
1. Getting To Know The Chief Architect CAD Functions
Starting a plan means understanding how the building will get designed and built. You'll see how to preplan the process so that as you are adding elements to the plan, you'll have a clear picture of what you want to accomplish.
1. Setting the Extended Toolbar (07:30)
2. Keystroke Basics and Customizing Hotkeys (10:10)
3. Point-to-Point Move & Opening an Object (16:26)
4. Uses for a Three-Button Mouse (23:38)
5. Setting Colors in Preferences (35:55)
6. Snap Tools (39:39)
7. CAD Box Tool (48:47)
8. CAD Tool Basics (49:09)
9. Moving Things on X, Y, Z-Axis (56:58)
10. Understanding the EDIT Icons (1:00:53)
11. Customizing Window Default Labels (1:05:54)
12. Displaying Patterns in 3D (1:12:37)
13. Using Gable/Roof Line Tool (1:15:43)
Total Running Time 1 hour 19 Minutes
2. Defining Project Parameters & Using Chief's 2D CAD
Discover how to approach the plan with the construction details in mind so that as you create the Chief model, it will be correct. In some situations, it pays to spend the time upfront, defining how the building will get structured before attempting to model it in Chief.
1. Learning The Edit Toolbar (4:27)
2. Next Button on Toolbar (5:47)
3. Open Edit Dialogue (6:22)
4. View Draw Order Edit Tool (8:01)
5. Copy and Paste Tool (11:09)
6. Delete Button on Toolbar (15:01)
7. Move a Line from a Shape Button (16:00)
8. Transform Replicate Icon (16:50)
9. Number Display for Dialogs (23:07)
10. Add Additional Angles for Snaps (30:59)
11. Making Multiple Copies of Items (32:56)
12. How to Reflect About Tool (39:15)
13. Alignment Parallel or Perpendicular (41:48)
14. X Key for Resizing (46:41)
15. Point-to-Point Move (S Key) (49:27)
16. Centering Tool (51:55)
17. Point to Point Snap (54:09)
18. Reflected Object (56:27)
19. Match Properties Button (58:19)
20. Break Tool (1:01:12)
21. Trim and Extend Tool (1:08:48)
22. Cloud Drawing Tool (1:11:22)
23. Arc/Line Tool (1:11:37)
24. Fillet and Chamfer Tool (1:15:16)
25. Tool Pallet (1:17:39)
Total Running Time 1 hour 20 Minutes
3. Setting up the Plan and 2D CAD Drawing Techniques
Whether you're drawing your details in 2D or getting them from the 3D model, you'll need to specify them correctly in Chief. In this session, we'll discuss the various methods used to accomplish this. We'll also discuss "Best Practices" to use when drawing details using the 2D CAD Tools.
1. Adding Details to Sample House Plan (9:48)
2. Considering Scale for Plan's Text (13:34)
3. Starting a House on Level One (14:56)
4. Transform Replicate Hotkey (22:12)
5. Center the Footing While Leaving (25:43)
6. Adding a Fill into a CAD Box (30:17)
7. TAB Key to move items (34:07)
8. Adding Sloped Rafters to a Detail (46:23)
9. Add Additional Angle to Snap Function (52:38)
10. Reflect to Create Mirrored Copy (58:40)
11. Customize Dimension Text (1:00:53)
12. Polyline Union to Create New Shape (1:10:13)
13. Group Multiple Items into a Block (1:12:13)
14. Adding Details to a Library (1:13:04)
15. Exporting and Importing Libraries (1:15:08)
Total Running Time 1 hour 20 Minutes
4. Defining Decks, Floor Structures
In this session, we'll take a close look at how to fine-tune various framing elements in Chief, so you're sure that the structure in your plans is correct in 2D and 3D. We'll work on the strategy for doing different ways. Creating and framing a deck and automatically and manually working on floor framing.
1. Drawing a Deck Automatically (3:45)
2. Changing Deck Structure (8:26)
3. Staggering Deck Joists (15:08)
4. Drawing a Deck Section (24:11)
5. Multiple Copy Evenly Spaced (25:54)
6. Reflect Tool on The Deck (31:34)
7. Clean Up Fraction Spaces (35:34)
8. Framing a Room & Adding Ceiling Trusses (36:41)
9. Delete Object Groups in Plan (43:48)
10. Frame Individual Rooms (45:19)
11. Floor Framing in Plan (46:57)
12. Framing Entire House (56:41)
13. Setting Default Size Floor Framing (1:03:45)
14. Open Below For Stairs (1:05:36)
15. Adding Additional Framing (1:06:53)
16. Setting Ceiling and Floor Heights (1:10:20)
17. Framing Floors Automatically (1:15:21)
Total Running Time 1 hour 23 Minutes
5. Defining and Modifying Wall Structures
In this session, we'll take a close look at how to fine-tune various framing elements in Chief, so you're sure that the structure in your plans is correct in 2D and 3D.
1. Wall Framing Overview (0:51)
2. Framing Reference Marker (6:03)
3. Rebuilding the Framing (10:34)
4. Adding and Resizing Hatching (11:58)
5. Setting Framing for Windows and Doors (22:04)
6. Manually Editing Framing (35:44)
7. Adding Bracing (Bridging) (46:08)
8. Manually Adjusting Framing (47:41)
9. Balloon Framing Through the Ceiling Above (51:49)
10. Adjusting Rough Openings (58:37)
11. Door and Window Labels (1:05:42)
12. Adding Bearing Points (1:08:11)
13. Furred Double walls (1:11:42)
14. Displaying As-Built Dotted Lines (1:15:05)
15. Changing Dimension Text Size on Layout (1:23:11)
16. Double Arrows (1:33:06)
17. Adding Furring Walls (1:37:00)
18. Reset the Toolbar to Default (1:39:16)
19. Adjusting Stem Wall Top Height (1:40:37)
Total Running Time 1 hour 42 Minutes
6. Defining Roof Structures and Bearing Conditions
There is a process you want to follow when framing the roof structure. Whether it's hand framed or trusses, there are easy ways in Chief to get the results you want. We'll also discuss how you can make sure that your design will be able to withstand the forces of gravity when it's gets built.
1. How to Group Delete Different Items in Plan (1:05)
2. Setting Defaults for Roof Framing (11:23)
3. Drawing Roof Trusses Starting Point (15:35)
4. CAD Detail Page with All Trusses in Plan (20:24)
5. Determining the Energy Heel Height in Roof (26:54)
6. Making a Gable End Truss for Roof (32:04)
7. Building a Simple Plan with Auto Roof Generator (40:11)
8. Creating a Bonus Room (42:08)
9. Add Attics to Plan (46:22)
10. How to revert room trusses to precise Thicknesses (50:28)
11. Parallel Chord Truss (53:01)
12. Scissor Truss (55:46)
13. Manually Frame the Entire Roof (56:59)
14. Doing a Plot Plan and Importing DWGs (1:02:54)
15. Set a Terrain Perimeter (1:11:30)
16. Show the Setback Lines in a Plot (1:18:09)
17. Change Text Size in Plan View (1:22:38)
18. Another Way to do Concentric Jump (1:25:48)
19. How To Create Plot Plan in Plan Footprint (1:28:39)
20. How Set Label to Decimal Feet in CAD Details (136:58)
Total Running Time 1 hour 39 Minutes
